11:27 AM Creating and Managing Logical Volume Manager in Linux |
Logical Volume Manager is a device mapper in LINUX which provides Logical Volume management.
With LVM, we can create logical partitions that can span across one or more physical hard drives.
LVM virtualizes the memory and the biggest advantage of LVM is that it allows disks to be added, replaced, reduced, resized without any downtime or service disruption.
LVM allows file systems to be easily resized later as per our need. Creating and managing LVM is very simple. Just follow 3 steps process:
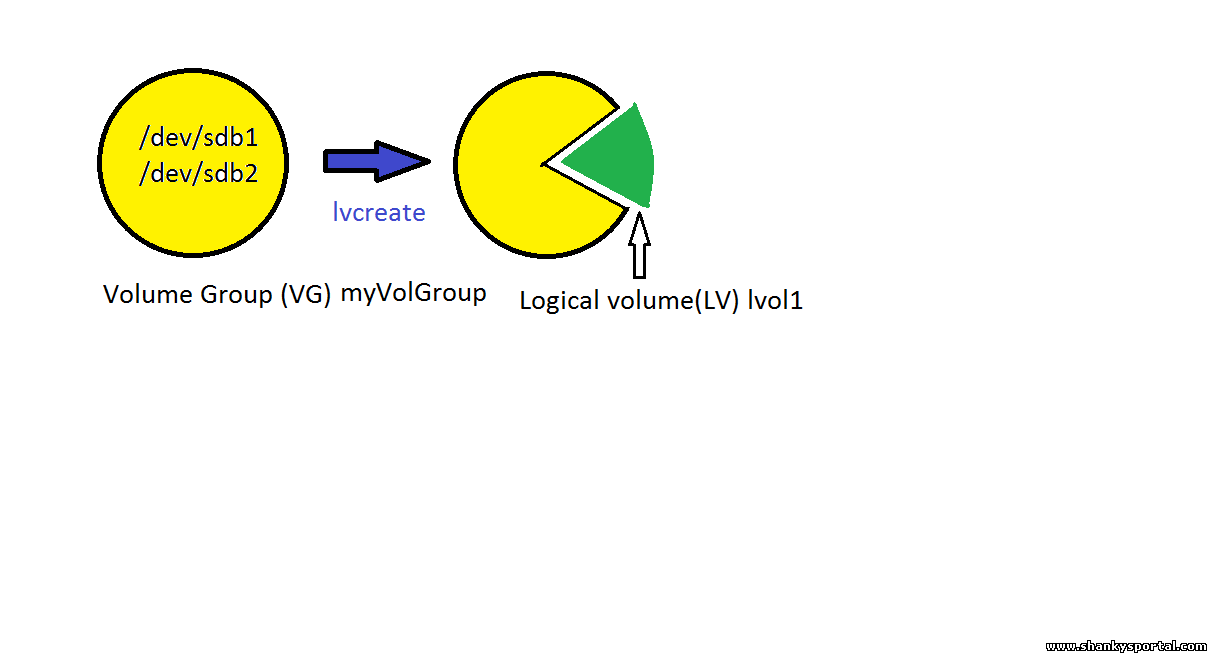
So, we need and un-partitioned disk from which we shall select physical storage devices for LVM. Next is we shall group them OR club them together to create vloume groups. Volume groups(VG) are nothing but a circular birthday cake and when we cut a piece of cake out of it, it becomes the logical volumes(LV). LVM is a part of lvm2 package. If this package is not installed in your system, install it using below command: sudo apt-get install lvm2
Lets start creating LVM. To check all available partitions , we can use below command or cat /proc/partitions: fdisk -l We can use cfdisk to create partitions: cfdisk /dev/sdb Now partitions are ready to be used. Next is we have to create physical volumes.
To display all created physical volumes, use pvdisplay command. Or to display information about a particular PV, use pvdisplay /dev/sdb1
Create Volume Group Now we shall create volume groups using these physical volumes. It will act as a container for our physical volumes Lets create a volume group with name myVolGroup which will include /dev/sdb1 and /dev/sdb2.
To display volume groups in your system,use vgdisplay command. Here, you can add new partition into you existing volume group using vgextend.
Create Logical Volume Now we have VG ready, we shall cut pieces(LV) out of the cake (VG) .
From the Big cake i.e. VG, we can cut as many pieces i.e. logical volumes as we want which will be treated as logical partitions for our system.
So, lets create a logical volume with name lvol1 with size 400 MB from the VG myVolGroup.
To display logical volumes in your system, use lvdisplay command. Similarly, to create logical volume of size 1000 mb ith name lvol2 from the same VG:
Now, we have created two LVs from our volume group, we can check available size in Volume group for any more possible LVs.
Lets make our LV usable To use the newly created LV, we need to create a file system.
Here -m 0 means that the percentage of space reserved for superuser is 0. If we don't give this option, the space reserved for superuser will be 5% by default.
Mount Logical volumes Before we mount this LV, we need to created a mount point that is a location where this filesystem will be mounted.
Add this file system entry into your /etc/fstab file to make it permanent. /dev/myVolGroup/lvol1 /home/shanky1 ext3 defaults 0 0
Now navigate to your new mount point.
You can check all your file systems and their mounted locations using df -hP command.
Biggest advantage of LVM is that we can extend the LVM anytime if we are running out of space.
The above command will increase the size of logical volume by another 800 MB. But this will not actually increase the physical size of the volume. To actually resize the volume, we have to use resize2fs command.
So, we need to unmount the file system before we resize.
Now lets try that resize command again.
So we execute e2fsck -f /dev/myVolGroup/lvol1 and then we execute the resize command again. Finally we mount the file system to make it usable.
Note that mount -a command will mount all file systems mentioned in /etc/fstab file as indicated except for those whose line contains noauto keyword.
Reduce logical volume
The above command will reduce LV size by 10 GB.
To remove a logical volume
|
|
|
Related blogs
You may also like to see:
| [2014-03-12] | [Open System-Linux] |
 uptime command in Linux uptime command in Linux | |
| [2014-02-12] | [Open System-Linux] |
| | |
| [2014-11-25] | [Open System-Linux] |
| | |
| [2014-12-24] | [Open System-Linux] |
| | |
| [2014-04-24] | [Open System-Linux] |
 Addition of two numbers using shell scripting in UNIX Addition of two numbers using shell scripting in UNIX | |
| Total comments: 0 | |